Wednesday, December 24, 2014

Dat Thang, Dat Thang Bun Thaannnngg (Bun Thang)


Apparently Bun Thang is the hardest thing in the world for my non Vietnamese friends. It's not thang, it's thang.  Why is it so hard?!

Anyways, this is a dish that I never liked much when I was a kid, but grew to like it as an adult. It's not as strong as pho, and I always thought it was bland.  However, recently I ordered it at a pho restaurant when I wasn't in the mood for pho and it was a pleasant surprise. It's light, and the different tastes and textures from the toppings really make for an interesting bite.  

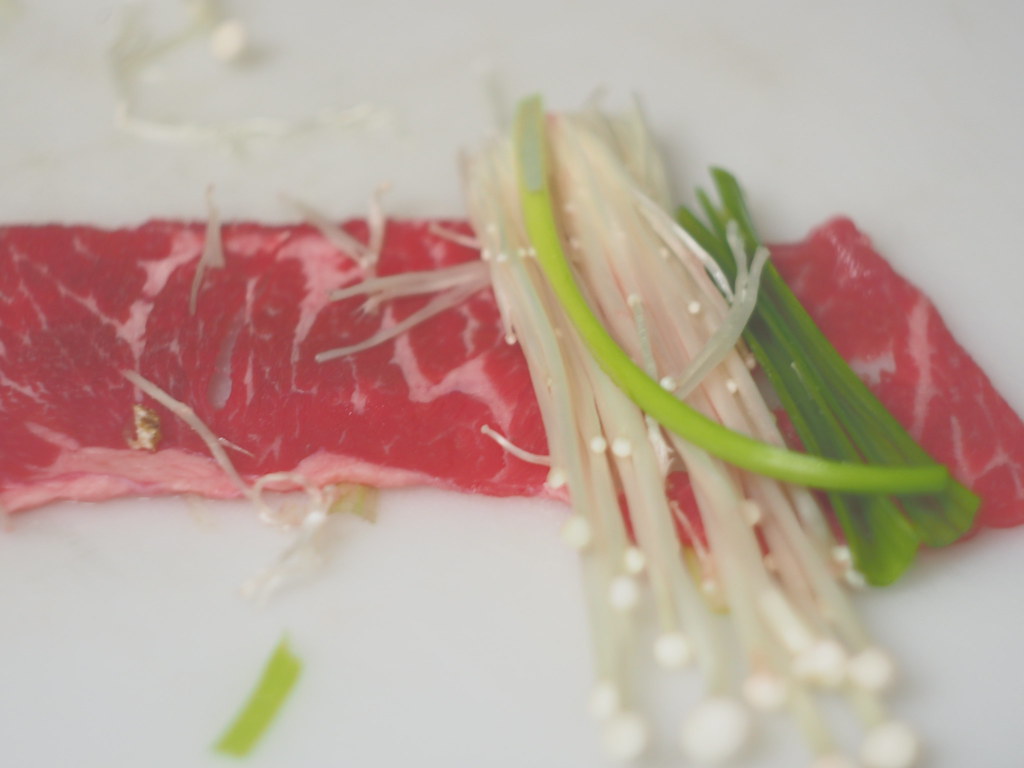
Bun Thang is topped with poached chicken, giò (vietnamese sausage/ham), scrambled eggs and sometimes mushrooms, all thinly sliced. As with most Vietnamese dishes, it's served with fresh herbs, in this case - rau ram.  I made this version using some wild foraged mushrooms that my friends picked up for me.  I used a mix of black trumpets, hedgehogs, oysters and chanterelles.  If you can't find these, you can use shitake mushrooms instead.

Anyways, it's really tasty and I hope you give it a try!

Bun Thang
Serves 6-8 

1 4-5lb chicken
4 liters of water
3 tbsp of dried shrimp
4 slices of ginger
1 stalk of green onion
1 yellow onion
1 tbsp salt
4 tbsp + 1 tsp fish sauce
1 cup of mushrooms
1 package of bun (rice vermicelli noodles) - cooked per package instructions

Toppings:
1 roll of giò (Vietnamese Sausage)
4 eggs
Rau Ram
Pickled Daikon (optional)

1. Stuff the internal cavity of the chicken with the green onion and 2 ginger slices.
2. Soak the dried shrimp in hot water for 15 minutes.
3. Fill a pot with 4 liters of water, add the chicken, the shrimp, onion, the other 2 ginger slices, salt, and mushrooms.  Bring to a boil then reduce heat to low and simmer for 30-40 minutes or until the chicken is cooked through.  Add the fish sauce 1 tbsp at a time to taste.
4. Remove the chicken and fish out the mushrooms from the broth. Let the chicken cool and peel the meat off in strips.
5. Beat together the eggs with a tsp of fish sauce.
6. This next step is a little tricky but if you can pull it off, it'll be well worth it.  Pour eggs into a hot non stick pan and swirl to coat, then immediately pour the eggs back into the bowl

7. The egg should cook enough within 10 seconds. At which point you can peel off the egg in a single thin layer.  Repeat this process with the rest of the egg.


8.  Thinly slice the egg and giò.  
9.  To assemble the bowls, start with the bun, top with the chicken, egg, giò, mushrooms, rau ram and pickled daikon.  Ladle the broth in and enjoy!


SUPER SPECIAL FUN TIME BONUS SECTION!!!

My friends went foraging for mushrooms out in the wilderness of California and brought these back for me.  

Black Trumpet Mushroom: This has a similar taste and texture to the wood ear mushrooms that are found in a lot of Vietnamese dishes

Hedgehog mushrooms: I like the texture of this one a lot, firm and holds up well to cooking. Flavor is mild.

Oyster mushrooms: Very large, kinda mushy texture, similar to shitakes that have been overly soaked.  Taste is pretty mild too.


Chanterlles (large and small): These babies are awesome. Super intense mushroom flavor and firm texture.  

Tuesday, December 23, 2014

When I dip, you dip, we dip. (tsuke-pho)


It's the most wonderful time of the year, when the office is closed and you're working from home. What better way to spend the time in between emails than to make a big pot of pho?

Lately I've been really into tsukemen, or dipping ramen, ordering it every time Amy and I go out for ramen.  It's a relatively new style of ramen, created by Taishoken in 1954.  I first learned of this dish when I saw it on the first episode of Mind of a Chef. In the episode, Chef David Chang (of Momofuku fame) travels to Japan to eat ramen, specifically tsukemen.  Tsukemen is different from regular ramen in that instead of the noodles sitting in the broth, you actually have the broth on the side and you dip the ramen noodles into the broth.  The broth is intensified and has a much stronger flavor, almost sauce like, in comparison to the lighter ramen broths of normal bowls, and the noodles are usually thicker than normal.  It's a really fun and delicious way to eat ramen, and for those that aren't super into drinking down the broth, preferring the toppings or the noodles to shine, this is perfect.

I figured that pho is to Vietnam what ramen is to Japan, so this style should translate well.  The majority of the steps are exactly the same as making pho (and you can find that recipe here), but there are a few key differences.  

So here it is, my Tsuke-pho, I really hope you try it out!

Tsukepho - makes 6-8 servings
For the Broth:
6lbs of beef shin bones
2 lbs of short ribs
2 medium sized yellow onions
1 4 inch piece of ginger
5 star anise
6 cloves
3 inch piece of cinnamon
1 oz chunk of rock sugar (about 1 square inch)
4 tbsp fish sauce
1.5 tbsp salt

For the Bowls:
2 one pound packages of pho noodles, dry or fresh (enough for 6-8 bowls)
1 lb of thinly sliced rib-eye
Limes
Bean Sprouts (can be served slightly steamed or raw)
Thai Basil
Saw tooth herb
Cilantro - diced
Green onion - diced
Sriracha
Hoisin Sauce


1. In a large pot, add the beef bones and enough water to cover, and bring to a boil.  Cook for 3-4 minutes.  Drain the water and scrub the bones under running water to remove all the gunk.  If you're using the same pot, make sure to clean it before putting the bones back in.

2. While the water is coming to a boil, char the onions and ginger over an open flame.  If you're in an apartment with electric stoves, use a portable camping stove.  For maximum smokey-ness, try charring the onions and ginger over a charcoal fire.  Once you get a nice char, rinse off any flakey or black bits from the onions and ginger.  Charring the onion and ginger adds a subtle sweetness and smokey note to the broth, and definitely should not be skipped.

3.In a dry pan, toast the star anise, cinnamon and cloves to release the flavorful oils trapped within.

4. Add 6 quarts of cold clean water to the pot, along with the onions, ginger, spices.  You would normally also add salt, rock sugar and fish sauce at this step, but because we'll be reducing the broth much further than we would with normal pho, save the seasoning until the end, otherwise it'll be too hard to predict the end flavor.

5. Sear your short ribs to develop a nice crust, add this to the pot.

6. Bring the whole thing to a boil over high heat, then reduce to low and simmer for 5 hours. Skim off any gunk that floats to the top, and any of the fat if you'd like.

7.  Now comes the fun part, remove all the bones and meat from the broth and strain.  You should be left with a clear pho broth.  At this point, you can choose to just season it and eat it as normal pho, but normal is boring.  Take your beef bones, and carefully remove the marrow from the bones (these should be super tender and almost falling apart.) Add this marrow and both of the now mushy onions back to the broth.  Using a stick blender, blitz the onions and marrow until no more large chunks are visible, this will help make the broth super rich and thick.  Turn the heat up to high and reduce the broth down by 1/2.  You should be left with about 2 quarts at the end.

8.  Add the rock sugar, salt and fish sauce, and adjust to taste. It should taste extremely strong.  Since the noodles are unseasoned, we need the broth to bring all the flavor here.

9. Cook your noodles al dente, slice up the meat and serve!  To eat, dip your noodles into the broth and slurp it up.


Sunday, November 30, 2014

Shake it off! Shake it off! (Bo Luc Lac)


It seems like the only Vietnamese phrase my Chinese friends know is "Bo Luc Lac."  Probably because it sounds funny.  Luc lac means shaking and Bo means beef, so shaking beef.  Named because when cooking, you shake the beef cubes around to coat with sauce and to cook evenly. This wasn't a dish I ever really ate growing up, my mom never made it and I never ordered it at Vietnamese restaurants since it was always one of those add on menu items.

Luckily, growing up in San Jose, where we have the largest Vietnamese population in the US, allowed me to eat at a ton Vietnamese restaurants growing up. The thing with Vietnamese restaurants is that they'll specialize in a particular dish, and do that dish really well.  Pho shops do pho, if you want rice plates, you go to a rice plate place, and so on.  Most will have a few other items on the menu, but you wouldn't go to a rice plate place and order their pho.

Unfortunately, there's no place I know of that only does bo luc lac, and so I never ordered it.  It wasn't until going to school in Davis (with only 2 Vietnamese restaurants) that I was exposed to this dish.  I guess I've been missing out all these years.  Succulent, tender beef, coated in a complex sauce served with peppery watercress and sharp picked shallots to cut through the fattiness of the beef.

It's a pretty easy to make dish, but I decided to update it with a modern twist to make it a little easier to have come out perfect every time.

Shaking Beef
2 lbs of steak - your choice in cut, I prefer rib eyes.

Shaking Beef Sauce:

1 tbsp sugar
1/4 cup soy sauce
1 tbsp dark soy sauce
2 tsp fish sauce
1/4 cup rice vinegar
1/4 cup mirin
Pepper to taste

Pickled Shallots

1 sliced shallot
2 tbsp rice vinegar
1 tbsp sugar
1 tbsp water

Accompaniments 
Watercress (or arugula)
Tomatoes
Cucumbers
Rice

1. Sous vide steaks to desired done-ness. Here I did 130F for 2 hours for med. rare. (See my sous vide steak post on how to cook the perfect steak)
2. Sear steaks in a hot pan with a generous amount of oil for 45 seconds each side to brown.
3. Pour out oil, but reserve the bits that are stuck on the pan.
3. Combine the sauce ingredients, along with the juices from the sous vide bag. Deglaze the pan with sauce mixture.  Simmer over low heat until slightly thickened.
4. Cut beef into cubes and toss in the sauce to coat.  Serve immediately with rice, and vegetable accompaniments.  Or serve with sauce on the side.

Tuesday, November 11, 2014

It's steak night, we gonna eat right!


It came! After almost a year of ghetto rigged set ups, and 7 months after backing their kickstarter, my Anova Precision Cooker finally came in today.  I felt like a kid again, opening up my long awaited prize.  Of course, I had to start it off with what drew me to sous vide in the first place, steak.

I think JD and Turk said it best, it really is the world's best meat.


Cooking sous vide allows you to have a perfect steak every time, as you set the water bath to the exact temperature that you want your steak done (125 for rare, 135 for med-rare and so on).  The water slowly cooks the steaks, bringing them up to temperature and you get a perfectly cooked steak from edge to edge.  All it needs after is a little sear to give it a nice crust and you're good to go!  Top it off with some spicy tart crying tiger sauce and it truly is a treat.

Sous vide Steaks
serves 2
2 1lb ribeye steaks
fresh thyme
salt and pepper

Crying Tiger Sauce
5oz of cherry tomatoes
1 shallot (unpeeled)
3-4 cloves of garlic (unpeeled)
1 chili (add more or omit depending on your spice tolerance)
1 tbsp fish sauce
1 tbsp lime juice
1/2 tsp sugar
2 tbsp of diced cilantro
2 tbsp of diced rau kinh gioi (Vietnamese mint)

Sous Vide Steaks
1. Season steaks liberally with salt on both sides, and place into a ziploc bag with the thyme sprigs. Submerge the bag under water, keeping the lip of the bag above the water line, to force air out and form a vacuum seal.  Or, if you have a vacuum sealer, use that.


2. Set your circulator to desired temperature (I did 130 for just barely medium rare.)  If you don't have a circulator, boil some water and adjust with cold water until you get the desired temperature.  I recommend going 5 degrees warmer than desired since the water will cool down a bit over time.  You'll have to monitor the water temperature throughout the cooking process to make sure it stays within the desired range, but for this short of a time, it shouldn't fluctuate that badly, especially if you use an insulated container like a beer cooler or styrofoam box.  Place the sealed steaks into the water and set a timer for 1.5 hours.

3. Once done, remove the steaks from the bags and pat them dry. It'll look grey and pretty unappetizing, but don't worry, we're going to sear it get a nice crust going.


4. Heat a pan or cast iron skillet over high heat, and get it hot hot.  Sear the steak on each side for 30 seconds and allow the maillard reaction to take place.  The end result is a crispy crust with tons of umami goodness.  Finish with a little more salt and pepper to taste. Let the steak rest for a minute and you're good to go! Because of the slow cooking process, you won't lose as much moisture and don't need to rest the steak as long.


Crying Tiger Sauce
1. Place tomatoes, chilis, garlic, and shallots in a roasting pan.  Turn your broiler on high and broil for 8 minutes.


2. Once cooled down, use a spoon to smush the garlic and shallots out of their papery outer layers (which should both be almost like a paste) and combine the rest of the ingredients.  Blitz with a stick blender or use a food processor.   Serve with the steak (duh).


Sous vide Steaks
serves 2
2 1lb ribeye steaks
fresh thyme
salt and pepper

Crying Tiger Sauce
5oz of cherry tomatoes
1 shallot (unpeeled)
3-4 cloves of garlic (unpeeled)
1 chili (add more or omit depending on your spice tolerance)
1 tbsp fish sauce
1 tbsp lime juice
1/2 tsp sugar
2 tbsp of diced cilantro
2 tbsp of diced rau kinh gioi (Vietnamese mint)

Sous vide Steaks
1. Salt both sides of steak. Place steaks in bags with thyme and seal. Place in water bath for 1.5 hours.
2. Remove from bath, pat dry and sear in a hot pan. Salt and pepper to taste.

Crying Tiger Sauce
1. Toast tomatoes, shallots, garlic and chilis under a high broiler
2. Once cool, combine the rest of the ingredients and blend together.


Sunday, November 9, 2014

Let that marinade for a while...


From what I've been told by my parents, when they go back to Vietnam, they'll find that the food there just doesn't live up to their memories, and often times the American version is much better.  I'm sure for some things like seafood, nothing will beat a freshly caught fish from the Pacific, but for proteins like pork, chicken and beef, the quality of the American product is far superior.  This is probably why there so many meat dishes in Vietnamese cuisine heavily lean on sauces and marinades to flavor the protein, helping to cover up the poor quality.  Of course, I just pulled all of this out of my ass so I have no idea if it's true or not.

This is my lemongrass marinade, tweaked over countless bbq's and week night dinners.  I think it's pretty good.  The subtle sweetness and herby taste from the lemongrass goes great with pork, chicken or beef.  Whether you cook it in a pan, baked in an oven, it'll taste amazing (although it tastes best cooked over a hot charcoal grill - although what doesn't taste best cooked that way?)  

In this preparation, I marinaded 2 chicken breasts overnight, then cooked sous-vide at 150F for 2 hours and crisped the skin in a skillet. Served with a side of papaya salad.

Lemon Grass Marinade
(enough for 3lbs of protein)
1/4 cup of minced lemongrass
1/4 cup of sugar
2 tbsp of fish sauce
1 tbsp of dark soy sauce
1 tsp of pepper
2 tsp of sesame oil


Sunday, October 26, 2014

O Lepo Lepo, O Lepo Lepoooo - Moqueca de Peixe (Brazilian Fish Stew)


A few months ago I was fortunate enough to be able to travel to Brazil for the World Cup. It was such an awesome time with awesome friends in an awesome country. I guess you could say it was awesome. Despite some small setbacks, like getting ripped off by taxis, bitten by prostitutes or going to shady dance clubs, my time there was truly spectacular.

Of course the parties and the soccer were phenomenal, but the food really stood out for me.  While we were in Salvador (Brazil's old capital, located right by the ocean) we ate tons of moqueca, a fish or seafood stew that's indigenous to the area.  It's typically served over rice, with a side of Farofa (casava flour fried into a gritty consistency) and a caipirinha to wash it down.  Our first pot of moqueca was so good we practically licked our plates clean (of course we also were not allowed to throw any food away or else one of our friends would whine about it).

I was worried that once I left Salvador, I'd never be able to eat it again, but luckily you can find almost all the ingredients at your local grocery store.  The only hard to find ingredient is dende oil, or red palm oil.  This deep red oil was found all over Salvador and was used to cook pretty much everything, from the deep fried acaraje to of course, moqueca.  Luckily, Amazon carries dende oil, and it's prime eligible too! What a world we live in.

Definitely try this out, plus you probably won't run this risk of getting bitten in the face by a whore making this at home.

Moqueca  de Peixe
Serves 4.

2 lbs of firm white fish (I used mahi mahi)
1 onion diced
2 limes
6 roma tomatoes
2 garlic cloves diced
2 bell peppers (I used the little mini bell peppers) diced
1/2 bunch of cilantro
1 hot pepper of your choice (for heat)
1 can coconut milk
1 tbsp of tomato paste
3 tbsp dende oil
2 tbsp olive oil
salt and pepper to taste

Farofa
1/2 cup of casava flour
1 garlic clove diced
2 tbsp olive oil


1. Cut the fish into large, even chunks and marinade in the juice of 1 lime, 1 tbsp olive oil and 1 tsp each of salt and pepper for 30 minutes


2. Blanch tomatoes in boiling water for 1 minute then transfer to an ice bath.  Peel off the tomato skins and dice the tomatoes (optional but I don't like tomato skins)


3. In a clay moqueca pot (or a large dutch oven if you're not in Brazil) on high heat, sweat the onions and garlic with the olive oil.  After onions turn translucent, add the hot peppers, bell peppers, tomatoes, and tomato paste.  Cook on high for 2-3 minutes.


4. Add the coconut milk and dende oil and bring to a boil, then lower heat and simmer for 10 minutes.

5. Add fish simmer until fish is cooked all the way through (about 4 minutes).  At the last minute, add the cilantro and squeeze in the juice of 1 lime.  Serve over rice.

Farofa
1. To make the Farofa, heat skillet on high with olive oil and saute garlic for 2 minutes or until fragrant.  Add the casava flour and toss to coat.  Toast this for 3-4 minutes or until brown.  Serve with meat skewers, moqueca, tacos, salad, beans, rice or anything that you want to add some crunch.


Moqueca  de Peixe
Serves 4.

2 lbs of firm white fish (I used mahi mahi)
1 onion diced
2 limes
6 roma tomatoes
2 garlic cloves diced
2 bell peppers (I used the little mini bell peppers) diced
1/2 bunch of cilantro
1 hot pepper
1 can coconut milk
1 tbsp of tomato paste
3 tbsp dende oil
2 tbsp olive oil
salt and pepper to taste

Farofa
1/2 cup of casava flour
1 garlic clove diced
2 tbsp olive oil


1. Cut the fish into large, even chunks and marinade in the juice of 1 lime, 1 tbsp olive oil and 1 tsp each of salt and pepper for 30 minutes
2. Blanch tomatoes in boiling water for 1 minute then transfer to an ice bath.  Peel off the tomato skins and dice the tomatoes
3. In a clay moqueca pot (or a large dutch oven if you're not in Brazil) on high heat, sweat the onions and garlic with the olive oil.  After onions turn translucent, add the hot peppers, bell peppers, tomatoes, and tomato paste.  Cook on high for 2-3 minutes.
4. Add the coconut milk and dende oil and bring to a boil, then lower heat and simmer for 10 minutes.
5. Add fish simmer until fish is cooked all the way through (about 4 minutes).  At the last minute, add the cilantro and squeeze in the juice of 1 lime. Serve over rice.

Farofa
1. Heat skillet on high with the olive oil and saute garlic for 2 minutes or until fragrant.  Add the casava flour and toss to coat.  Toast this for 3-4 minutes or until brown.  Serve with meat skewers, moqueca, tacos, salad, beans, rice or anything that you want to add some crunch.

Monday, October 20, 2014

Hainan Chicken Rice and Com Ga. A study in multi-cultural adaptations.


Chicken rice.  Com Ga. Hainan Chicken.  A dish that can be found across Asia (as I've been told, I haven't been to Asia in a while.)  

From Singapore to Vietnam to China, each country puts it's own little twist on it. In Vietnam, we call it Com Ga. In China, they call it chicken riceahhhhhhhh. Whatever you call it and however you serve it, it's a delicious, and super easy to make. Perfect for a week day meal.

Com Ga is served with nuoc cham (a fish sauce/sugar/vinegar mixture) and Hainan chicken is served with a ginger scallion sauce.

So let's do this thing!

Com Ga/Hainan Chicken
Serves 4

1 4lb Fryer chicken
1 stalk of green onion
1 3 inch knob of ginger
3 cups of uncooked rice
2 quarts of water
1 tsp of salt

Brine:
2 quarts of water
6% by weight kosher salt (about 1/2 cup per quart of water)

Ginger-Scallion sauce
2 green onions - diced
1 3 inch knob of ginger
1/2 cup of vegetable oil
1 tsp salt

Nuoc Cham (prepared fish sauce)
Ask your mom to make you a giant jug of it


First things first, we're going to brine the chicken over night in a 6% salt solution.  This is where a kitchen scale comes in handy.  Measure out 2 quarts of water, or enough to cover the chicken, and dissolve kosher salt until you reach a 6% salt solution by weight.  If you don't have a scale you can use 1/2 cup of salt per quart of water to get you close.

Cover the chicken in the brine and place in refrigerator over night.  The purpose of the brine is to ensure the chicken is extra moist once you're done cooking it.  The salt dissolves some of the myosin proteins in the chicken, allowing them to absorb more moisture.  Don't worry, it won't be overly salty.


The next day, wash off the brine thoroughly.  Stuff the cavity of the chicken with the onion and ginger. Place the chicken into a pot with a tsp of salt and cover with water. Bring it to a boil over high heat.  Once at a rolling boil, turn off the heat and cover the pot with a lid and let it stand for 15-20 minutes or until the breast temp reads 145F with a meat thermometer.  Remove from the pot and let chicken cool.

Instead of water, we'll be using the stock from cooking the chicken to cook the rice. Make sure you get the fat floating at the surface for some extra flavor.  I threw in the ginger and onion from the cooking the chicken for a little extra oomph.


To make the ginger-scallion sauce, heat up the oil and diced onions until it starts bubbling slightly.  In the mean time, grate the ginger.  Once the oil starts bubbling, remove from the heat and add the salt and ginger.


Serve the chicken with the rice and your choice of sauces.


Com Ga/Hainan Chicken Rice
Serves 4

1 4lb Fryer chicken
1 stalk of green onion
1 3 inch knob of ginger
3 cups of uncooked rice
2 quarts of water

Brine:
2 quarts of water
6% by weight kosher salt (about 1/2 cup per quart of water)

Ginger-Scallion sauce
2 green onions - diced
1 3 inch knob of ginger
1/2 cup of vegetable oil
1 tsp salt

Nuoc Cham (prepared fish sauce)
Ask your mom to make you a giant jug of it

1. Brine chicken in 6% salt solution overnight
2. Wash off brine, stuff the chicken cavity with green onion and ginger. Place in pot and cover with water.
3. Bring to a boil then turn off heat and cover with lid. Let the residual heat cook the chicken for 15-20 minutes or until internal temp reads 145F
4. Cook rice using stock from cooking the chicken
5. Heat oil and diced onions until bubbles form.  Grate ginger and add to the oil along with the salt.
6. Serve rice and chicken with choice of sauce

Sunday, October 19, 2014

Dangggggg. Enoki Beef Wraps


A few months ago, my buddy turned the big 2-7. Gasp.  Officially in our late twenties now.  According to my high school yearbook, I should be a world famous plastic surgeon, living in a huge mansion and driving a Ferrari Enzo.  What happened? Where's my Ferrari?!? Taking Muni to work just doesn't have the same oomph.

Oh well. I guess 27 isn't so bad, it is divisible by both 3 and 9... buh dum psshhhh.  

Anyhow for his birthday, he had a huge BBQ at the park and everyone brought some dishes to share.  My other friend Jeff brought some Dang good enoki mushrooms wrapped in thinly sliced steak marinated in soy sauce (get it, because his last name is Dang.)   They were delicious, and being that everyone was super drunk, didn't last too long.

I had some left over meat and enokis from shabu shabu night so whipped this up for a quick sunday night dinner.  

They taste great in a pan but really shine on the grill.

Enoki Beef Wraps 
Serves 4 (quick steps at the bottom)

1 lb of thinly sliced short rib
1/2 package of enoki mushrooms (about 3.5oz)
1 green onion sliced into 3 inch pieces

Marinade
1 tbsp Ponzu sauce
1 tbsp Dark soy sauce 
1 tsp sesame oil
1 tsp sugar
1 minced clove of garlic
1/4 tsp pepper 

Take a small amount of the mushrooms, maybe 10 or so caps and a piece of the green onion and wrap it with a piece of the short rib.  Repeat.


In a small bowl, combine the marinade ingredients and then coat the beef. Make sure to roll the wraps around so they're evenly coated. Let marinade for 15 minutes.


Heat up a medium sized skillet over medium high heat for a few minutes to let it get nice and hot.  Place the beef wraps into the skillet and quickly sear one side.  Cover with a lid for 2 minutes to allow the mushrooms and onions to cook.  After 2 minutes, remove the lid and turn the wraps so you can sear the other side, cook for another minute.   Let it rest for 2-3 minutes.  Serve with a side of rice.  

Alternatively, you can cook these over a hot charcoal fire, turning every 30 seconds so it evenly cooks. Cook for 2 minutes, then let rest for 2-3 minutes before serving.


Enoki Beef Wraps
1 lb of thinly sliced short rib
1/2 package of enoki mushrooms (about 3.5oz)
1 green onion sliced into 3 inch pieces

Marinade
1 tbsp Ponzu sauce
1 tbsp Dark soy sauce 
1 tsp sesame oil
1 tsp sugar
1 minced clove of garlic
1/4 tsp pepper 

1. Wrap 1 piece of onion and about 10-12 caps of mushrooms with the short rib
2. Combine the marinade and coat the beef wraps evenly, let marinade for 15 minutes
3. In a medium pan, cook over medium high heat for 2 minutes covered, turn the wraps then cook 1 minute uncovered (or grill over a hot charcoal fire for 2 minutes, turning every 30 seconds)

Wednesday, October 15, 2014

Pho-co Moco - Creative Leftovers


Leftovers.  I never seem to remember the meals they were leftover from.  But they're always there, in your fridge, wasting away in styrofoam boxes and plastic to-go containers before you finally decide to make room for some beer and throw away the food, which by now has probably started showing signs of intelligence.

Of course you could just reheat in the microwave and often times that'll do pig, that'll do.  But luckily if you're creative, you can make a new creation out of what's left in your fridge.

This is my take on the Hawaiian loco-moco, a beef patty topped with a fried egg served over rice and smothered in gravy.

I guess I'll call it pho-co moco, made from the leftovers of my pho burger.


Pho-co Moco
Recipe makes 4 servings.  (Quick recipe at the bottom)

4 Pho-burger patties
2 cups of white rice, cook it first, duh.
1 package of beef meat balls
8 eggs
2 cups of pho broth
1.5 tbsp of hoisin sauce
2 tbsp of white flour
thai basil
green onions


1. Heat a 12 inch skillet on high until so hot you could fry an egg on it (literally) and cook your burger patties. Once cooked to your liking, remove and reserve the patties in a warmed oven.

See all that fat and brown bits stuck to the bottom of the pan? You want that. That fond and fat will make the gravy oh so good.


Add in the flour and mix in with a whisk, this will form a roux.  Allow the roux to cook for 4-5 minutes over medium heat to cook out the raw taste in the flour.  Then add the pho broth. Make sure to whisk while adding the broth in to avoid lumps in your gravy.  Keep over a medium heat and reduce.

When the gravy has reduced to a "nape" state (easily coats the back of a spoon), you're done!  You can strain the gravy too if you don't like lumps. Those lovely lady lumps.


For the rice portion.  Dice the meat balls into bite sized chunks and do a quick sear with the white part of the green onions. Add the rice and hoisin sauce and mix until well combined. Add in basil leaves towards the end.


Finally fry up 2 eggs per person.

Top the rice with the burger patties, the fried eggs and pour on the gravy. Oh yeah and don't forget to instagram that shit before you dig in.


Pho-co Moco
Recipe makes 4 servings.

4 Pho-burger patties
2 cups of white rice
1 package of beef meat balls
8 eggs
2 cups of pho broth
1.5 tbsp of hoisin sauce
2 tbsp of white flour
thai basil
green onions

1. Cook burger patties in heavy pan, reserve.
2. Add flour to the pan to make a roux, cook for 4 minutes and add broth while whisking.  Reduce gravy until thickened
3. In another pan, add meat balls and green onions, cook for 2-3 minutes.
4. Add white rice and hoisin sauce and mix until uniform.
5. Fry eggs
6. Serve rice topped with burger patty, eggs and gravy.


Monday, October 13, 2014

Being An Adult Sucks

Growing up sucks. You have to do your own laundry, you have to cook your own meals, you have to clean the dishes after you eat. UGH. Can my mom come to the city and do my chores for me, it's only 50 miles away. Thanks Mom!


This is a fairly typical meal that I had growing up. A meat dish and a soup dish, served over rice.  Today I went with caramelized chicken and a simple water spinach soup.  Clean, healthy eating after a weekend of dirty martinis.

Water Spinach Soup (Canh Rau Muong)
Makes 4 servings
A big bushel of water spinach (Rau Muong), cut into 3-4 inch pieces
about a quart of water
2 garlic cloves
1/2 a lime
2 tbsp of fish sauce (more to taste)


1. In a pot, bring 1 quart of water to a rolling boil and add the washed water spinach.
2. After 4 minutes remove the water spinach from the water.
3. Add 2 crushed cloves of garlic (don't mince), the lime juice and the fish sauce. Bring back to simmer.
4. Simmer for 5-10 minutes to let the flavors marry, add the water spinach back to the broth before serving.
5.  I like to serve this soup with a side of pickled egg plants in fish sauce, easily found at any Asian grocery store.


Caramelized Chicken (Ga Ram Mam)
Makes 4 servings
1 lb of chicken thighs, cute into 2 inch chunks
1 minced clove of garlic
2 minced green onions
1 tbsp of sugar
1/4 tsp salt
1/4 tsp pepper
1 tbsp vegetable oil
1 tbsp fish sauce (or to taste)


1. Add the minced garlic and the white part of the green onion to the chicken along with the salt and pepper. Mix and let marinade for 15-20 minutes.

2. In a sauce pan or small pot, add the sugar and oil and turn the heat to high.  Let the sugar melt and turn to caramel. DO NOT STIR the sugar with anything, just roll the pan around until it looks caramel-y


3. At this point, add the chicken and quicky stir to coat the chicken with the caramel sauce.  Then add 1/4 cup of water and the fish sauce and cover with a lid (or a plate if you can't find that one lid that fits)


4. Bring the chicken to a boil and then reduce the heat to med-low and cook for 5 minutes.  Then remove the lid and let cook for another 20 minutes until the sauce has reduced and thickened.  Sprinkle on the rest of the green onions. Serve immediately.

Meals like this are easy to make on a weeknight when you're lazy since the majority of the cook time is just waiting around. The beauty with these meals are that they're pretty versatile, you can switch out the protein or the veggies with whatever you have around so you don't even have to go to the store.  Plus afterwards, you don't have that many dishes to clean because they're both cooked in 1 pot.  I guess growing up isn't that bad.

But now... what to do about that pile of laundry...